Learn how easy it is to make marbled soap using a melt and pour base (great diy gift idea!)
With Christmas right around the corner, I am once again in full DIY gift crafting mode. Like many of you, I absolutely love making personalized presents for my friends and family.
And, I especially love making beauty products such as hand scrubs, moisturizers, bath salts and now handmade soaps.
Over the past few years, I have made brown sugar vanilla scrub and and yummy bath bombs so this year I decided to try my hand at marbling soap with a soap base such as melt and pour goat milk soap.

As I said above, I did not actually make the soap. Instead, I found this awesome goat milk soap base which was super easy to use for these soap swirl techniques.
Also, I added different colors with special soap colorants or dyes and fragrant essential oils to make a wide variety of different scented soaps.
Note: Make sure any additives you use are soap grade
What is melt and pour soap?
Melt and pour soap is a ready-to-use soap base made with traditional ingredients such as fatty acids and glycerin.
This soap can be used as-is or you can add your own scents (essential oils), colors (natural or dye) and exfoliators (s.a. oats).
Supplies needed
- Goat Milk Soap Base
- Essential Oils s.a. Sandalwood, Peppermint or Sweet Orange
- Soap Making Dyes
- Molds
- Microwave Safe Bowl OR Double boiler
- Toothpicks
- Oven Mitts
- Spoon
- Microwave or Stovetop


Personalizing handmade soaps
Handmade soaps make a wonderful DIY Gift idea! There are several ways that you can personalize your soaps for your recipient.
Do they have a favorite scent? You can make lavender soaps for your Mom or perhaps sandalwood for your Dad or Boyfriend?
Also think about the mold shape. Heart shaped molds are, of course, ideal for a Valentine gift.
How to make marbled soap with a swirl technique:
1. Melt the Soap Base


Microwave Method:
If you are using your microwave, break the melt and pour soap base into pieces and place them in your microwave safe bowl.
Heat for 30 seconds on the “High” setting then stir. Continue microwaving and stirring at 15 second intervals until your soap is fully melted.
Stovetop Method:
Add some water to the pot of your double boiler and heat on the stove until it is just simmering. Now, place your soap pieces in the bowl and set this on top of the pot. Stir until soap is completely melted.
2. Add swirls or marbling in the soap
Using your oven mitt, very carefully pick up the bowl and pour the melted soap in the soap molds.
Note: You may want to start with one or two molds at a time until you get a feel for how quickly the soap cools.
Caution: The melted soap will be HOT!

For each bar of soap:
First, add one or two drops of essential oil to the melted soap.
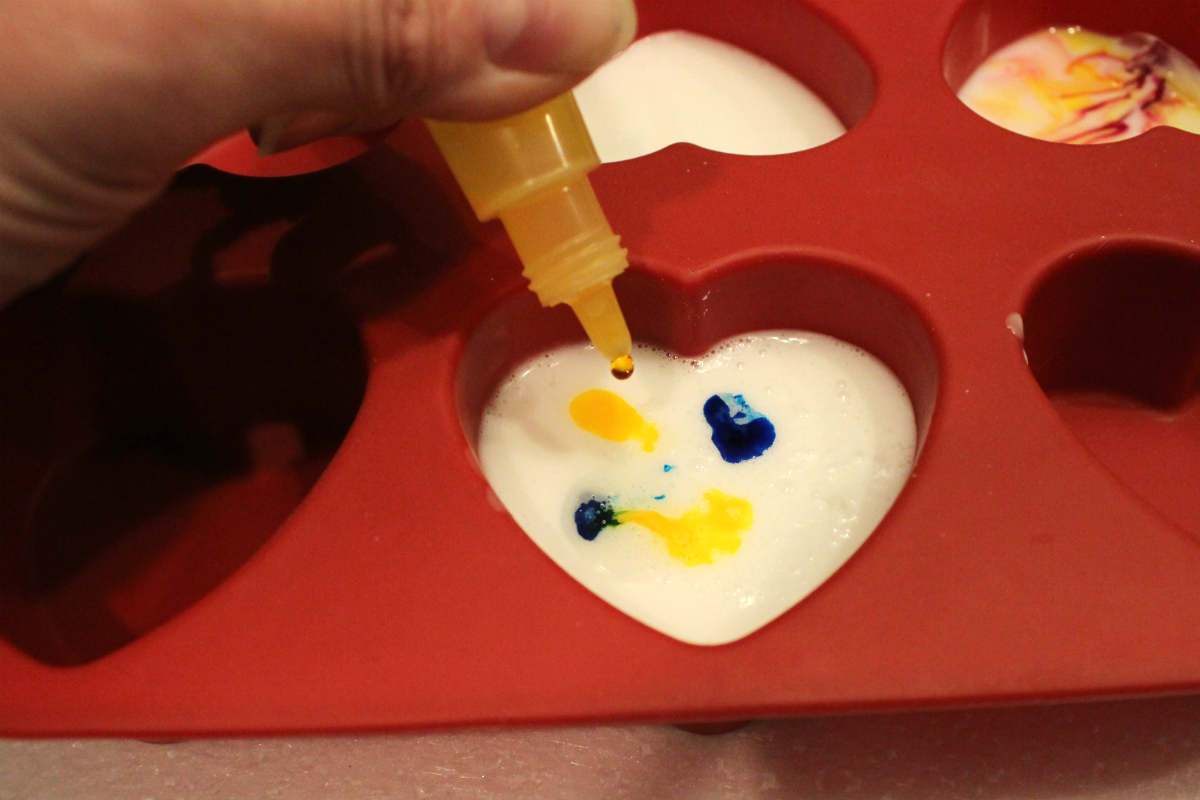
Next, add one or two drops of a dye or colorant. Using a toothpick, swirl this color around in the soap. Not too much. If you want swirls, you don’t want to mix the color in completely.
Now, add a couple drops of the second color (if using). Again, swirl this with a toothpick.


Repeat above steps for each bar of soap.


3. Finish the marbled soap
All that is left now is to let your soaps set for at least one hour. If after an hour, they not set completely, simply place your molds in the refrigerator for about 15 minutes.
When set, carefully, remove your soaps from their molds. If the soap is stuck in the mold, you can gently score the edge with a sharp knife and it should pop right out.


That was it! See how easy marbling soap with a soap base really is?
And as I said above, these pretty marbled soaps make wonderful gifts not just for Christmas but also for Birthdays, Mother’s Day and especially Valentine’s Day!
The fun part is that you can make these soaps into virtually any shape you want and the fragrance options are almost limitless.
I hope you enjoyed this post. If you try it, please let me know how your marbled goat milk soaps turned out.
Enjoy!
Annette
How do you make soap base?
If you are going to be making a lot of soap, you may wish to make your own soap base instead of using store bought melt and pour soap.
Making a basic soap is a bit of an undertaking once you get the hang of it, you can make a large amount at once which can then be personalized with special fragrance and herbal additions.
Here is a great tutorial for making your own soap base.
Related Homemade Beauty Recipes
DIY Lotion Bars & Lip Balm
Pamper You Bath Bombs
Brown Sugar and Vanilla Body Scrub
Peppermint Bath Salts
DIY Foaming Soap
18 DIY Gifts of Beauty


What a pretty end result!
Thank you, Erika 🙂
These look like they would be fun to make. My cousin makes soap and lotion from goat’s milk but she has goats. I use goat’s milk soap and love the way it makes my skin feel.
I love it, too! Unfortunately, I can’t have goats where I live but I can get the base 🙂