Learn how easy it is for you to make beautiful printed tea towels, t-shirts as well as handmade greeting cards with a simple stencil and some acrylic paint.
**This post is sponsored by Stencil Revolution and may contain affiliate links. All opinions expressed are my own.
Stenciling with paint is a super easy craft project that anybody can master. There are just a few little hints and tips to make your printed stencil work clean and neat.
One of my favorite DIY Gift Ideas is to make personalized cloth napkins, tea towels or kitchen towels. Also, I love to use these Cotton Flour Sack towels which are wonderfully absorbant and super easy to dye, paint or stencil on.
These towels are so fun and easy to paint, you’ll want to print a bunch of them for every Holiday. Bunny towels for Easter??

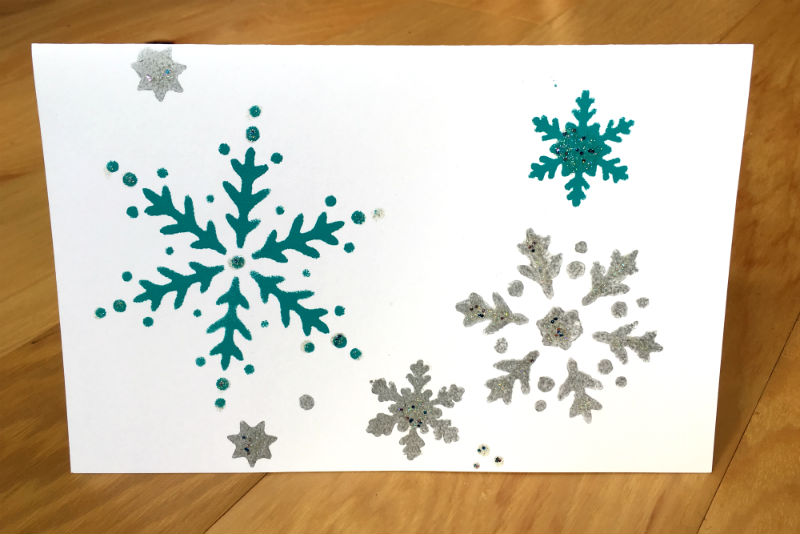
Since the Holidays are just around the corner, I’m showing you how to make painted snowflakes with this fun Christmas stencil.
These stenciled tea towels were actually part of a Christmas present for my Mom! Plus, there is still time for you to make some of the snowflake Christmas cards and get them in the mail.


Good advice from Stencil Revolution ” … there will be tiny imperfections. Expect it and let it go. Our eyes will see motifs and pattern not each individual flaw.“
Materials and Tools
– Stencils (this one came from Stencil Revolution)
– Cotton Flour Sack Towels
– Fabric Paint OR
– Acrylic Paint and Textile Medium
– Stencil Brushes or Pouncers
– Masking Tape (optional)
– Piece of Cardboard or Paper Plate

Step by step stencil on fabric
First, before you can begin, you have to thoroughly wash and dry your fabric or tea towels. This removes any sizing which may interfere with the adhesion of the acrylic paint. Also, if the fabric is very wrinkled, go ahead and iron it.
To begin, lay your fabric or towel on a table and smooth out any wrinkles. Place the stencil on top of your fabric and secure the corners with tape, if using.
- For Fabric or Textile Paint:
If you’re using paint made specifically for fabric and textiles, no special prep is required. Simply shake your bottle of paint and then squeeze out a small amount on the plate.
- For Acrylic Paint and Textile Medium:
Mix the two according to directions on the Textile Medium. My bottle calls for 3 parts paint to 1 part Textile Medium. I used an old paint brush to blend them together.
To begin stenciling, take a pouncer, dip it in the paint and stamp it a few times on the plate or scrap paper to remove excess. Keep in mind, you only want enough paint to cover the pouncer but no more.

Holding your pouncer straight up, begin applying paint to your fabric by tapping the pouncer up and down on the stencil until the cut out space has been completely covered.
Refill the paint as necessary. I suggest moving slowly until you get a feel for the process.


Setting the Fabric Paint
Finally, allow your fabric to dry overnight. Check the directions on the textile medium or fabric paint. They may require heat setting the paint with an iron before washing.
Stenciling works great on all kinds of fabric pieces. Try making tote bags, headbands, pillowcases, lampshades, curtains, napkins, kitchen towels, hand towels, burlap, table cloths, table runners, tee shirts, canvas shoes and hats.
Stenciling on Paper
The process for stenciling on paper is the same for paper such as greeting cards as it is for fabric. You just need to make sure your paper is a heavy, smooth Cardstock.
Obviously, you also won’t use fabric paint. Simple, inexpensive Acrylic Paint is perfect.
Now, same as you did for the towels, load your pouncer (or stencil brush) sparingly and apply the paint to your paper. Very thin layers are best so your paint doesn’t pool and run. Allow your paper to dry completely.

You can’t really see it in the photo but I embellished my Christmas Card with glitter nail polish to give it some sparkle and dimension. If you prefer, you can use glitter glue or glitter paints.
I love this project for the simplicity. It truly is one of those crafts that virtually anyone can do with wonderful results.
The stencil from Stencil Revolution was very high quality: Sturdy with firm edges to prevent bleeding yet flexible. It also cleaned up fairly easily (with a sponge) and can be used over and over.
Stenciling Tips and Tricks
Tape down the stencil. Taping the stencil to your fabric or paper will keep it from moving around while you are dipping the brush or pouncer in the paint and applying it.
I did not tape my stencil but it did move around so next time I definitely will. Make sure to use appropriate tape for your paper so it doesn’t tear when you remove it.
Don’t us too much paint. Dip your pouncer into the acrylic paint and then tap it on some scrap paper or fabric a few times to get rid of the excess paint. You don’t want any paint to squeeze under the stencil which will make a messy print.
Hold your stippling brush or pouncer straight up. Holding your pouncer perpendicular to the fabric or paper will help to keep the paint from bleeding under the stencil.
How to Make a Stencil
If you’re having trouble finding just the right stencil for your project, you can actually make your own. Here’s a great tutorial showing you how to make your own stencils.
Related Fabric Painting and Dyeing Ideas
Shibori Tie Dyed Tea Towels
Eco Printing on Fabric
25 Craft Projects using Burlap Fabric
Kumo Shibori Fabric Dyeing
How to Tie Dye a Heart
Reverse Tie Dyeing with Bleach
23 Tie Dye Ideas and Projects
Related Holiday Craft Articles
Fall and Thanksgiving Crafts
Christmas Holiday Crafts


